hexo博客butterfly主题安装及魔改笔记
2024-04-24更新
- 基于butterfly主题4.13.0+版本,其他版本会有所差异,本个性化修改备忘录为从安装hexo开始。
- 参考文档:hexo官方文档、butterfly主题官方文档、npm包官方登记站。
- 系统环境:window10/11
安装/搭建/配置
代码编辑器推荐:可以下载个Visual Studio Code,可以代码高亮和插件支持相当nice,设置中文界面点击左侧最下拓展程序,搜索Chinese (Simplified)
进行安装重启编辑器即可。
安装node.js 和 Git。
换源
更换成国内阿里系阿里云npm源、腾讯、华为等的镜像站,加快模块安装速度:
常见npm源:
1 | #npm 官方原始镜像网址是: |
例如换成阿里源
:在将要安放博客项目文件的目录里右键菜单Git Bash here
打开Git Bash
并继续:
1 | npm config set registry https://registry.npmmirror.com |
查看镜像源配置信息:
1 | npm info underscore |
安装hexo命令包
1 | npm install -g hexo-cli |
查看hexo版本:
1 | hexo -v |
初始化网站
初始化博客根文件夹[blog]
(将生成一个名为“blog”的文件夹作为工作目录并初始化生成hexo博客文件):
1 | hexo init blog |
进入blogName文件夹:
1 | cd blog |
安装butterfly主题
butterfly主题文件放入 [blog]\themes\butterfly\
路径下,最终可见[blog]\themes\butterfly\_config.yml
。
打开butterfly主题链接并下载source Code(zip)到本地并解压。
Github:
1 | git clone -b master https://github.com/jerryc127/hexo-theme-butterfly.git themes/butterfly |
Gitee:
1 | git clone -b master https://gitee.com/iamjerryw/hexo-theme-butterfly.git themes/butterfly |
适合hexo5.0.0以上版本
1 | npm i hexo-theme-butterfly |
应用主题
修改站点配置文件_config.yml,把主题改为butterfly
1 | theme: butterfly |
安装必要插件
安装pug 以及 stylus 渲染器插件
1 | npm install hexo-renderer-pug hexo-renderer-stylus --save |
安装:部署插件hexo-deployer-git
、文章字数统计插件hexo-wordcount
、博客内容搜索插件hexo-generator-search
1 | npm install hexo-wordcount hexo-generator-search hexo-reference hexo-deployer-git --save |
渲染markdown文章如出现空格等转义字符不生效问题,可以进行如下 :
- 卸载原来的markdown渲染器:
1 | npm uninstall hexo-renderer-marked --save |
1 | npm i @upupming/hexo-renderer-markdown-it-plus --save |
方便升级进行配置:
- 新建文件
[blog]\_config.butterfly.yml
,把[blog]\themes\butterfly\_config.yml
里的全部内容复制到[blog]\_config.butterfly.yml
里。 - 以后只需要在 _config.butterfly.yml进行配置就行。
- Hexo会自动合并主题中的
[blog]\themes\butterfly\_config.yml
和[blog]\_config.butterfly.yml
里的配置,如果存在同名配置,会使用_config.butterfly.yml
的配置,其优先度较高。
部署流程
部署方式选择
hexo毕竟生成的是静态网页,计算资源要求低,部署方式相当灵活,常见的有云服务器
、虚拟主机
、静态网站托管平台
、对象存储
、某些大气的代码托管平台
、自建小服务器
比如软路由/工程小主机离谱的甚至有电视盒子和旧手机等等。
但是按照目前的环境,国内的云服务商提供的服务价格往往都比较昂贵并且对于小白坑比较多,而且需要备案,备案又要求你有服务器或类似服务器的计算服务,这比较麻烦,建站不商业化盈利仅仅作为高级玩具或者用于学习之用的话,建议一开始找能白嫖的先用着,后续如果想进阶再另作改进。
方式介绍:
云服务器、虚拟主机
各大平台阿里云、腾讯云等新人注册首单价格倒算是厚道,当然只能一个月最多一年有优惠,拿来学习学习倒是可以,对于没有盈利能力来说后续的续费就很不划算了,其他体量小些的平台估计能白嫖或者低价使用的也有,得自己找了。自建服务器
这属于会折腾硬件才能玩得起的玩意,不作介绍。静态网站托管平台
- Gitee Pages:国内最大的代码托管平,稳定性强,国内访问速度非常快。仓库的最大容量和单个文件大小有限制,对仓库内容非常敏感,需要实名认证,自定义域名和自动部署都需要收费。适合不需要自定义域名并且网站内容少、内容几乎不变的场景,但是每次部署前都会对仓库内容进行检查,博客内容多点容易触发敏感词判定,那就GG了,排查起来麻烦,不考虑建博客用。
- GitHub Pages:全球最大的代码托管平台,稳定性强,部署简单,使用方便,支持自定义域名,但是国内访问速度一般,拒绝百度爬虫访问,不想太折腾并且对百度收录没有要求的话可以选择使用,比较推荐。github官网
- Cloudflare Pages:Cloudflare推出的一项服务,不限站点数、请求数和带宽,全球都拥有CDN节点,支持自定义域名和自动部署。国内访问速度和稳定性一般,有每月构建次数500次、文件数量20000、大小25Mb的限制,但是对于小博客已经很够用了,推荐。
- 对象存储
主流云服务商都有对象存储服务,比如阿里云、百度云、腾讯云、又拍云、七牛云等等,可用作静态网站的部署,但是里面的坑得提一下,虽然存储价格相对便宜,但是流量费挺贵的,不会弄的话,被恶意刷流量能把你房子刷没了,毕竟大多不支持设置流量到顶自动停止服务,不欠费怎么赚?懂得都懂。
而且里面的防盗设置十分基础和简单(主要是支持高级防盗的小白又玩不起,需要有服务器才能玩起来),防了个寂寞,其中又拍云稍微好点,设置挺丰富的。 其中高级点的方案有CDN
+对象存储
,风险防护作用相对前面单纯使用对象存储要强一些和成本便宜不少,访问速度基本杠杠的,不过同样不支持设置流量到顶自动停止服务,所以被恶意刷欠费的风险还是有的。没钱包风险承受能力和不会整的不建议。
git key公钥生成
- 桌面或blog文件夹右键菜单选择
Git Bash here
打开git,然后依次执行:
配置用户名和邮箱:1
2git config --global user.name "github 用户名"
git config --global user.email "github 注册邮箱" - 接着生成 ssh 密钥文件,输入如下命令后直接三次回车即可,一般不需要设置密码,如果要设置密码,显示password/passphrase提示时输入要设置的密码回车,再次输入密码回车即可;
生成 ssh 密钥:一般执行上述命令之后,会生成 id_rsa 和 id_rsa.pub 两个文件,在1
ssh-keygen -t rsa -C "github 注册邮箱"
C:\用户\xxx\.ssh\
文件夹里,前者是我们私有的,而后者则是对外开放的即后面要用到的。
Github pages部署
首先介绍比较推荐的GitHub部署,没有注册账号的先注册,注册方法自行搜一下。Github访问慢问题,可以打开windows10/11自带的Microsoft store应用商店,搜索Watt Toolkit
进行安装,打开勾选Github一键加速即可。
Github新建仓库
- 登录github,点击
repositories
进入仓库页面,点击NEW
新建,在Repository name
处填入仓库名,仓库名填用户名.github.io
,用户名为英文且建议不要太复杂,但是又要能体现你个人特点,因为后续让别人访问你的博客时,就要通过https://用户名.github.io
这个域名来访问。接下来选择Public
公有,最后点击Create repository
完成创建。接着可以看见Quick setup — if you’ve done this kind of thing before
,点击SSH
,复制右边的git@github.com:xxxxx/用户名.github.io.git
即为仓库链接,打开[blog]\_config.yml
找到选项并进行填入:1
2
3
4deploy:
type: git
repository: git@github.com:xxxxx/用户名.github.io.git
branch: master
推送内容,开启pages
打开GitHub-Settings-Keys 页面,创建一个新的SSH key,填写Title和 Key,Title 可以随意,而Key的内容则是前面我们刚才
git key公钥生成
部分生成的的 id_rsa.pub 中的内容,复制粘贴最后点击 Add SSH key 即可进行推送仓库授权。新建文章
博客文件夹[blog]\
目录下右键菜单选择Git Bash here
打开git,输入hexo new post xxx
生成新文章xxx.md的markdown文件,在[blog]\source\_posts\
里可以找到,对其用markdown语法编辑即可书写文章啦生成、推送文章
编写好文章后继续依次执行:1
2
3hexo clean
hexo g
hexo d即可执行清除缓存、生成静态网站文件、推送到仓库。
推送到仓库完成后,打开github,刷新页面
本地博客执行推送到仓库后,刷新页面,进入刚才建的仓库 点击setting,左边找到pages项,继续找到 branch 选择 master 点击 save 保存,等待一会,刷新即可出现访问链接提示
Your site is live at
,到这就部署完成。
ps:如果预览显示错乱,至少把_config.yml
中的url
选项 即前面Your site is live at
提示的访问链接填上再推送一次即可。
常见hexo命令以及说明:
1 | hexo new post Name #新建名称为 Name 的md文章 |
cloudflare pages部署
用cloudflare pages部署的话访问速度可能大概会比Github pages好一点,薛定谔的比较。此时部署分为两种情况:
- 一种是本地生成静态网页推送到GitHub,cloudflare再拉取GitHub仓库上渲染好的网页文件进行展示,该方法每次推送都能在1-2分钟内就完成博客内容更新并展示;
- 另一种就是hexo博客源文件推送到GitHub,cloudflare再拉取GitHub仓库上的博客源文件执行 环境搭建、hexo clean、hexo g等博客网站文件生成操作,这种方法坏处就是执行速度慢得排队,容易失败,一般得等5-6分钟才能更新完成。
所以这里采用第一种方法,可以很无缝承接github pages。
cloudflare注册
注册就不必展开说了,基本大同小异。
创建项目
- 登录找到 pages,点击创建项目,点击 git,选择 GitHub,接着进行账户授权,输入密码啥的,接着 Repository access 处进行授权,有全部授权All repositories 和单独授权Only select repositories ,按需选择,比如选择
用户名.github.io仓库
,点击save。 - 跳转回来后 创建项目,点击 git,选择刚才授权的仓库,在构建命令处填写
exit 0
即可,其他不用填,点击开始部署,等它部署完成即可。 - 文章推送:跟前面Github pages部署处一模一样,本地hexo三联命令执行即可。使用cloudflare pages部署可以关闭GitHub的pages,设置private私有仓库也是可以的(GitHub pages需要保持public公有)。
vercel部署
用vercel部署部署的话访问速度也大概会比Github pages好不少,前提是需要绑定自己的域名
,否则国内无法访问你的博客。此时部署分为两种情况:
- 一种是本地生成静态网页推送到GitHub,vercel再拉取GitHub仓库上渲染好的网页文件进行展示,该方法每次推送都能在1分钟内就完成博客内容更新并展示;
- 另一种就是hexo博客源文件推送到GitHub,vercel再拉取GitHub仓库上的博客源文件执行 环境搭建、hexo clean、hexo g等博客网站文件生成操作,这种方法坏处就是执行速度慢得排队,容易失败,一般得等5-6分钟才能更新完成。
所以这里采用第一种方法,可以很无缝承接github pages。
vercel账号注册
具体注册vercel,推荐使用github账号登录即可。
创建项目
- 登录vercel后,
Add New --> project
,创建项目,Import Git Repository
导入你github上创建的存放渲染好的网页文件的blog仓库:需要提前注册github账号和设置好两步验证(推荐手机安装App Aegis 进行,记得备份恢复码)等设置,并且创建好博客仓库blog
或其他你喜欢的名字,仓库可以设置为私有private
- 项目名称
Project Name
你可以起个喜欢的名字,Framework Preset
选择Other
,直接部署Deploy
即可,然后点击部署好的项目,Setting--> Domains
进行域名绑定即可。 - 更多具体细节怎么设置可以浏览搜一下相关教程。
- 文章推送:跟前面Github pages部署处一模一样,本地hexo三联命令执行即可。关闭GitHub的pages,设置private私有仓库也是可以的(GitHub pages需要保持public公有)。
个性化配置
写在前面:
- 其他详细的基础设置配置参照butterfly主题官方文档进行即可。
- 博客配置文件:
[blog]\_config.yml
文件。 - 主题配置文件:即前面 方便升级进行配置 而建的
[blog]\_config.butterfly.yml
文件,相当于[blog]\themes\butterfly\_config.yml
。 - 博客配置
按照博客配置文件里相应注释进行更改。 - 主题个性化
按照主题配置文件里相应注释进行更改。
主题自带配色配置
找到并修改[blog]\_config.butterfly.yml
中如下配置:
1 | #注意加英文双引号,根据需要进行修改 |
字数统计
安装文章字数统计插件: hexo-wordcount
1 | npm install hexo-wordcount --save |
主题配置文件:
1 | # wordcount (字數統計) |
网站内搜索
安装网站内搜索搜索插件: hexo-generator-search
1 | npm install hexo-generator-search --save |
主题配置文件:
1 | # Local search |
鼠标内置点击特效
修改相应主题配置值为true:
1 | # Mouse click effects: fireworks (鼠标点击效果: 火焰特效) |
魔改配置
采用尽量不需改源码的形式,即引入外部js、css样式进行覆盖。
引入自定义css
文件:blogName\themes\butterfly\source\css\路径下新建文件custom.css
,并在主题配置文件中修改成如下:
1 | inject: |
引入自定义js
文件:blogName\themes\butterfly\source\js\路径下新建文件custom.js
,并在主题配置文件中修改成如下:
1 | inject: |
图标引入:
- 主题默认使用fontawesome图标,使用第三方图标参考:Hexo博客之优雅使用阿里iconfont图标。
- 引入阿里图标库图标大小会与周围组件不协调,在
custom.css
文件中加入代码即可:1
2
3
4/*引入图标大小固定为主题自带参数*/
.iconfont {
font-size: 100% ;
}
自定义鼠标指针
鼠标文件 式
下载鼠标指针文件,放入blogName\themes\butterfly\source\cursor路径下,文件格式.cur
在custom.css
文件中加入代码:
1 | /*鼠标指针*/ |
Dot Cursor 鼠标指针
名字自己安的,笑。
Fork: Ariasaka | 博客魔改日志(1)新建
themes/butterfly/source/js/custom/DotCursor.js
文件:1
2
3
4
5
6
7
8
9
10
11
12
13
14
15
16
17
18
19
20
21
22
23
24
25
26
27
28
29
30
31
32
33
34
35
36
37
38
39
40
41
42
43
44
45
46
47
48
49
50
51
52
53
54
55
56
57
58
59
60
61
62
63
64
65
66
67
68
69
70
71
72
73
74
75
76
77
78
79
80
81
82var CURSOR;
Math.lerp = (a, b, n) => (1 - n) * a + n * b;
const getStyle = (el, attr) => {
try {
return window.getComputedStyle
? window.getComputedStyle(el)[attr]
: el.currentStyle[attr];
} catch (e) {}
return "";
};
class Cursor {
constructor() {
this.pos = {curr: null, prev: null};
this.pt = [];
this.create();
this.init();
this.render();
}
move(left, top) {
this.cursor.style["left"] = `${left}px`;
this.cursor.style["top"] = `${top}px`;
}
create() {
if (!this.cursor) {
this.cursor = document.createElement("div");
this.cursor.id = "cursor";
this.cursor.classList.add("hidden");
document.body.append(this.cursor);
}
var el = document.getElementsByTagName('*');
for (let i = 0; i < el.length; i++)
if (getStyle(el[i], "cursor") == "pointer")
this.pt.push(el[i].outerHTML);
document.body.appendChild((this.scr = document.createElement("style")));
this.scr.innerHTML = `* {cursor: url("data:image/svg+xml,<svg xmlns='http://www.w3.org/2000/svg' viewBox='0 0 8 8' width='8px' height='8px'><circle cx='4' cy='4' r='4' opacity='.5'/></svg>") 4 4, auto}`;
}
refresh() {
this.scr.remove();
this.cursor.classList.remove("hover");
this.cursor.classList.remove("active");
this.pos = {curr: null, prev: null};
this.pt = [];
this.create();
this.init();
this.render();
}
init() {
document.onmouseover = e => this.pt.includes(e.target.outerHTML) && this.cursor.classList.add("hover");
document.onmouseout = e => this.pt.includes(e.target.outerHTML) && this.cursor.classList.remove("hover");
document.onmousemove = e => {(this.pos.curr == null) && this.move(e.clientX - 8, e.clientY - 8); this.pos.curr = {x: e.clientX - 8, y: e.clientY - 8}; this.cursor.classList.remove("hidden");};
document.onmouseenter = e => this.cursor.classList.remove("hidden");
document.onmouseleave = e => this.cursor.classList.add("hidden");
document.onmousedown = e => this.cursor.classList.add("active");
document.onmouseup = e => this.cursor.classList.remove("active");
}
render() {
if (this.pos.prev) {
this.pos.prev.x = Math.lerp(this.pos.prev.x, this.pos.curr.x, 0.15);
this.pos.prev.y = Math.lerp(this.pos.prev.y, this.pos.curr.y, 0.15);
this.move(this.pos.prev.x, this.pos.prev.y);
} else {
this.pos.prev = this.pos.curr;
}
requestAnimationFrame(() => this.render());
}
}
(() => {
CURSOR = new Cursor();
// 需要重新获取列表时,使用 CURSOR.refresh()
})();ps:记得在
_config.buttterfly.yaml
inject:处 bottom:下引入:- <script src="/js/custom/DotCursor.js"></script>
自定义引入的css文件
themes/butterfly/source/css/custom/custom.css
添加代码:1
2
3
4
5
6
7
8
9
10
11
12
13
14
15
16
17
18
19
20
21
22
23
24
25
26#cursor {
position: fixed;
width: 16px;
height: 16px;
background: #000;
border-radius: 8px;
opacity: 0.25;
z-index: 10086;
pointer-events: none;
transition: 0.2s ease-in-out;
transition-property: background, opacity, transform;
}
#cursor.hidden {
opacity: 0;
}
#cursor.hover {
opacity: 0.1;
transform: scale(2.5);
}
#cursor.active {
opacity: 0.5;
transform: scale(0.5);
}
鼠标拖动星星特效
在custom.js
加入:
1 | (function fairyDustCursor() { |
滚动条样式
在custom.css
文件中加入代码:
1 | /* 滚动条样式 和选中文本颜色*/ |
加气泡动画
参考Heson大佬的项目cavan泡泡,演示地址
在themes\butterfly\source\js\
目录下新建 bubble.js 文件添如下代码:
1 | (function () { |
在blogName\_config.butterfly.yml
文件如下位置添加如下备注的代码2处:
1 | inject: |
更多博客配色修改
彩色背景
- butterfly3.3.8版本参考Hexo博客之butterfly主题优雅更换背景:
custom.css
新增代码:1
2
3
4
5
6
7
8
9
10
11
12
13
14
15
16
17
18
19
20
21
22
23
24
25
26
27
28
29
30
31
32
33
34
35
36
37
38
39
40
41
42
43
44
45
46
47
48
49
50
51
52
53
54
55
56
57
58
59
60/****************************************/
/*butterfly3.3.8版本*/
#web_bg {
background: -webkit-linear-gradient(
0deg,
rgba(247, 149, 51, 0.1) 0,
rgba(243, 112, 85, 0.1) 15%,
rgba(239, 78, 123, 0.1) 30%,
rgba(161, 102, 171, 0.1) 44%,
rgba(80, 115, 184, 0.1) 58%,
rgba(16, 152, 173, 0.1) 72%,
rgba(7, 179, 155, 0.1) 86%,
rgba(109, 186, 130, 0.1) 100%
);
background: -moz-linear-gradient(
0deg,
rgba(247, 149, 51, 0.1) 0,
rgba(243, 112, 85, 0.1) 15%,
rgba(239, 78, 123, 0.1) 30%,
rgba(161, 102, 171, 0.1) 44%,
rgba(80, 115, 184, 0.1) 58%,
rgba(16, 152, 173, 0.1) 72%,
rgba(7, 179, 155, 0.1) 86%,
rgba(109, 186, 130, 0.1) 100%
);
background: -o-linear-gradient(
0deg,
rgba(247, 149, 51, 0.1) 0,
rgba(243, 112, 85, 0.1) 15%,
rgba(239, 78, 123, 0.1) 30%,
rgba(161, 102, 171, 0.1) 44%,
rgba(80, 115, 184, 0.1) 58%,
rgba(16, 152, 173, 0.1) 72%,
rgba(7, 179, 155, 0.1) 86%,
rgba(109, 186, 130, 0.1) 100%
);
background: -ms-linear-gradient(
0deg,
rgba(247, 149, 51, 0.1) 0,
rgba(243, 112, 85, 0.1) 15%,
rgba(239, 78, 123, 0.1) 30%,
rgba(161, 102, 171, 0.1) 44%,
rgba(80, 115, 184, 0.1) 58%,
rgba(16, 152, 173, 0.1) 72%,
rgba(7, 179, 155, 0.1) 86%,
rgba(109, 186, 130, 0.1) 100%
);
background: linear-gradient(
90deg,
rgba(247, 149, 51, 0.1) 0,
rgba(243, 112, 85, 0.1) 15%,
rgba(239, 78, 123, 0.1) 30%,
rgba(161, 102, 171, 0.1) 44%,
rgba(80, 115, 184, 0.1) 58%,
rgba(16, 152, 173, 0.1) 72%,
rgba(7, 179, 155, 0.1) 86%,
rgba(109, 186, 130, 0.1) 100%
);
}
/*************************************/ - butterfly4.4.0+版本则也可直接在
_config.butterfly.yml
文件中找到background:
后面添加如下所示:
1 | background:rgba(247, 149, 51, 0.1) 0,rgba(243, 112, 85, 0.1) 15%,rgba(239, 78, 123, 0.1) 30%,rgba(161, 102, 171, 0.1) 44%,rgba(80, 115, 184, 0.1) 58%,rgba(16, 152, 173, 0.1) 72%,rgba(7, 179, 155, 0.1) 86%,rgba(109, 186, 130, 0.1) 100% |
当然一般以custom.css
优先级为最高
文章目录激活色
- 自定义引入的
custom.css
新增代码:1
2
3
4/*效果看本站文章侧边目录*/
.toc-link.active {
background: #FCA4D4
}
菜单栏毛玻璃特效以及配色
- 自定义引入的
custom.css
新增代码:1
2
3
4
5
6
7
8
9
10
11
12
13
14
15
16
17
18
19
20
21
22
23
24
25
26
27
28
29
30
31
32
33
34
35
36
37
38
39
40
41
42
43
44
45
46
47
48
49
50
51
52
53
54
55
56
57
58
59
60
61
62
63
64
65
66
67
68
69
70
71/******************************************************/
/*顶部栏*/
#page-header.nav-fixed #nav{
background: rgba(246, 239, 246, 0.61) ;
backdrop-filter: blur(8px) ;
}
[data-theme=dark]
#page-header.nav-fixed #nav{
background: rgba(79, 76, 79, 0.35) ;
backdrop-filter: blur(8px) ;
}
#nav .show{
background: rgba(246, 239, 246, 0.61) ;
backdrop-filter: blur(8px) ;
}
[data-theme=dark]
#nav .show{
background: rgba(79, 76, 79, 0.35) ;
backdrop-filter: blur(8px) ;
}
/*手机模式侧边栏*/
#sidebar #sidebar-menus.open{
background:rgba(246, 239, 246, 0.75) ;
backdrop-filter: blur(3px);
border-radius: 6px 0 0 6px;
}
[data-theme=dark]
#sidebar #sidebar-menus.open{
background:rgba(252, 224, 252, 0.11) ;
backdrop-filter: blur(3px);
border-radius: 6px 0 0 6px;
}
/*侧边控制按钮*/
#rightside > #rightside-config-show > #rightside_config,
#rightside > #rightside-config-show > #to_comment,
#rightside > #rightside-config-show > #go-up,
#rightside > #rightside-config-show > #go-down,
#rightside > #rightside-config-hide > #readmode,
#rightside > #rightside-config-hide > #translateLink,
#rightside > #rightside-config-hide > #hide-aside-btn {
background: opacity(0.3);
backdrop-filter: blur(3px);
}
[data-theme=dark]
#rightside > #rightside-config-show > #rightside_config,
#rightside > #rightside-config-show > #to_comment,
#rightside > #rightside-config-show > #go-up,
#rightside > #rightside-config-show > #go-down,
#rightside > #rightside-config-hide > #readmode,
#rightside > #rightside-config-hide > #translateLink,
#rightside > #rightside-config-hide > #hide-aside-btn {
background: opacity(0.3);
backdrop-filter: blur(3px);
}
/*搜索*/
#local-search .search-dialog,
#local-search .search-dialog .local-search-box input{
background:rgba(246, 239, 246, 0.75) ;
backdrop-filter: blur(3px);
border-radius: 6px 6px;
}
[data-theme=dark]
#local-search .search-dialog,
#local-search .search-dialog .local-search-box input{
background:rgba(252, 224, 252, 0.2) ;
backdrop-filter: blur(3px);
border-radius: 6px 6px;
}
/*******************************************************/
页脚全透明
自定义引入的custom.css
加入以下代码:
1 | #footer { |
页脚加入网站安全运行时间
引入自定义js文件inFootTime.js
,方法同 引入自定义效果 所述,代码如下:
1 | /*把不用的版本注释掉*/ |
blogName\themes\butterfly\layout\includes\footer.pug
文件新增如下备注的代码:
1 | if theme.footer.copyright |
参考:
配置评论系统
配置waline评论系统:
ps:
- leancloud(因为某些原因国际国内版都要绑定域名) + vercel部署(国内访问大概率抽风),本站点未使用leancloud数据存储+vercel后端。
- 安装及平台部署请参考文档 ① waline官方文档,项目地址。
- 安装参考文档 ② Guan Qirui的文章,参考前半部分,butterfly 3.8+
版本:waline v2.10.0+
配置项:
1 | comments: |
- 评论框以及后台管理等提示文本修改
修改[blog]\themes\butterfly\layout\includes\third-party\comments\waline.pug
文件增加locale
字段并在{}
里填写相应值:1
2
3
4
5
6
7
8
9
10
11
12
13
14
15
16
17
18
19
20function initWaline () {
const waline = Waline.init(Object.assign({
el: '#waline-wrap',
serverURL: '!{serverURL}',
pageview: !{lazyload ? false : pageview},
dark: 'html[data-theme="dark"]',
path: window.location.pathname,
+ locale: {
placeholder: '输入昵称和邮箱即可留言哦!',
sofa: '这个评论区有点冷 >﹏< ~',
admin: '博主',
approved: '通过',
waiting: '待审核',
sticky: '置顶',
nickError: '昵称不能少于3个字符',
mailError: '请填写正确的邮件地址',
},
comment: !{lazyload ? false : count},
}, !{JSON.stringify(option)}))
}
更多设置请参考官方文档locale选项
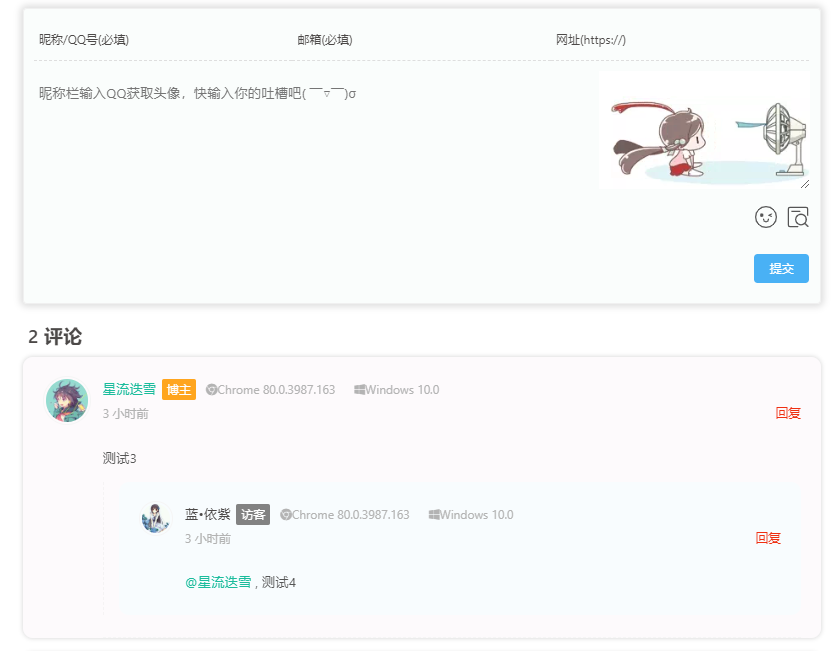
具体效果请看本站评论区。
- 服务端配置环境变量
开启相应功能比如邮件回复、评论需要登录等功能需要配置相应变量,参考文档waline服务端环境变量
配置valine评论系统并美化
本站点未使用。
- 配置LeanCloud(因为某些原因需要绑定域名才能使用)并获取
appID
和appKey
: 具体参照valine文档。 - 填写主题配置文件相应项:
1 | valine: |
- 添加标签
添加博主
访客
小伙伴
标签:
更换成魔改过的Valine.min.js
:
可以直接修改主题配置文件后面# comments
项的valine
子项链接为https://cdn.jsdelivr.net/gh/HCLonely/Valine@latest/dist/Valine.min.js
或者可以下载到博客theme/butterfly/source/js目录下并更换valine
子项链接为/js/Valine.min.js
修改themes\butterfly\layout\includes\third-party\comments\路径下1
2
3
4
5
6
7
8# comments
gitalk: https://cdn.jsdelivr.net/npm/gitalk@latest/dist/gitalk.min.js
gitalk_css: https://cdn.jsdelivr.net/npm/gitalk/dist/gitalk.min.css
#valine: https://cdn.jsdelivr.net/npm/valine/dist/Valine.min.js
valine: /js/Valine.min.custom.min.js #https://cdn.jsdelivr.net/gh/HCLonely/Valine@latest/dist/Valine.min.js
disqusjs: https://cdn.jsdelivr.net/npm/disqusjs@1/dist/disqus.js
disqusjs_css: https://cdn.jsdelivr.net/npm/disqusjs@1/dist/disqusjs.css
utterances: https://utteranc.es/client.jsvaline.pug
主题配置文件1
2
3
4
5
6
7
8
9
10
11
12
13
14
15
16
17
18
19
20
21
22
23
24script.
function loadValine () {
function initValine () {
let initData = {
el: '#vcomment',
appId: '#{theme.valine.appId}',
appKey: '#{theme.valine.appKey}',
placeholder: '#{theme.valine.placeholder}',
avatar: '#{theme.valine.avatar}',
meta: '#{theme.valine.guest_info }'.split(','),
pageSize: '#{theme.valine.pageSize}',
lang: '#{theme.valine.lang}',
recordIP: #{theme.valine.recordIP},
serverURLs: '#{theme.valine.serverURLs}',
emojiCDN: '#{theme.valine.emojiCDN}',
emojiMaps: !{emojiMaps},
enableQQ: #{theme.valine.enableQQ},
path: window.location.pathname,
//-添加博主 小伙伴 访客标签新增修改:
master: '', //博主邮箱md5 可使用网站 https://md5jiami.51240.com/ 进行转换
friends: ['',''], //小伙伴邮箱md5
tagMeta: ["博主","小伙伴","访客"],
//-
}valine
项:
1 | valine: |
1 | /* valine评论输入框背景*/ |
效果:
添加全局吸底 Aplayer 音乐播放器
以下步骤在 Butterfly 主题上可以正常生效
配置播放器
- 如果安装过 hexo-tag-aplayer 插件,参照该步骤,否则直接跳过该步:
博客配置文件:
1 | aplayer: |
- 开启 aplayerInject 选项:
主题配置文件:
1 | # Inject the css and script (aplayer/meting) |
- 全局播放不中断:
主题配置文件:
1 | pjax: |
- 插入 Aplayer 代码:
插入到主题配置文件的inject.bottom
:
1 | - <div class="aplayer no-destroy" data-id="732801999" data-server="netease" data-type="playlist" data-fixed="true" data-mini="true" data-listFolded="false" data-order="list" data-preload="none" data-autoplay="false" muted></div> |
参数:
关键字 | 默认值 | 选项描述 |
---|---|---|
data-id(必要) | 自己获取并填写 | song id / playlist id / album id / search keyword |
data-server(必要) | 自定义 | 填写歌曲平台: netease , tencent , kugou , xiami , baidu |
data-type(必要) | 自定义 | song , playlist , album , search , artist |
data-theme | #2980b9 | 主题颜色代码 |
data-loop | all | 音频循环播放, 可选值: all , one , none |
data-order | list | 音频循环顺序, 可选值: list , random |
data-preload | auto | 预加载,可选值: none , metadata , auto |
data-autoplay | false | 是否自动播放:true ,false |
data-mutex | true | 互斥,阻止多个播放器同时播放,当前播放器播放时暂停其他播放器 |
data-listFolded | false | 列表默认折叠 |
data-istMaxHeight | 340px | 列表最大高度 |
data-storageName | metingjs | 存储播放器设置的 localStorage key |
data-fixed | true | 开启吸底模式: true ,false |
data-mini | true | 是否显示完整播放器,开启/关闭 迷你模式: true ,false |
5. 设置Aplayer 收回方式 | ||
设置 Aplayer 收回时将音乐 Cover 也隐藏掉,只留下右侧的箭头栏,防止遮挡阅读: |
1 | inject: |
aplyer音乐播放器美化与深色模式
请看文章hexo博客butterfly主题aplyer音乐播放器美化与深色模式
live2D看板娘
安装hexo-helper-live2d插件:
1 | npm install --save hexo-helper-live2d |
1 | npm install live2d-widget-model-koharu /*koharu为模型名称*/ |
各模型名称及预览:
博客配置文件新增配置:
1 | live2d: |
友链页面美化
参考糖果屋Akilar的文章: Friend Link Card Beautify
- 新建友链页面(已经有了可跳过):
- 在Hexo博客根目录
[Blog]
下打开终端,输入hexo new page link
:
1 | hexo new page link |
- 打开
[Blog]\source\link\index.md
,添加一行type: 'link'
:
1 |
|
新建
_data
目录:blog\source\_data\
,并在里面创建一个文件link.yml
添加友链代码,样式如下:1
2
3
4
5
6
7
8
9
10
11
12
13
14
15
16
17
18
19
20
21
22
23- class_name: 友情链接
class_desc: 那些人,那些事
link_list:
- name: Hexo
link: https://hexo.io/zh-tw/
avatar: https://d33wubrfki0l68.cloudfront.net/6657ba50e702d84afb32fe846bed54fba1a77add/827ae/logo.svg
descr: 快速、简单且强大的网誌框架
- class_name: 网站
class_desc: 值得推荐的网站
link_list:
- name: bilibili
link: https://www.bilibili.com/
avatar:
descr: 年轻人的视频社区
- name: Weibo
link: https://www.weibo.com/
avatar: https://i.loli.net/2020/05/14/TLJBum386vcnI1P.png
descr: 中国最大社交分享平台
- name: Twitter
link: https://twitter.com/
avatar: https://i.loli.net/2020/05/14/5VyHPQqR6LWF39a.png
descr: 社交分享平台class_name 和 class_desc 支持 html 格式书写,如不需要,也可以留空。
取消
[Blog]\_config.butterfly.yml
中menu配置项内link
页面的注释:1
2
3
4
5
6
7
8
9
10menu:
Home: / || fas fa-home
Archives: /archives/ || fas fa-archive
Tags: /tags/ || fas fa-tags
Categories: /categories/ || fas fa-folder-open
# List||fas fa-list:
# - Music || /music/ || fas fa-music
# - Movie || /movies/ || fas fa-video
Link: /link/ || fas fa-link
# About: /about/ || fas fa-heart
修改
[Blog]\themes\butterfly\layout\includes\page\flink.pug
,此处添加判断机制,使得可以通过修改配置文件来切换友链风格。同时为了方便管理,把各个友链样式放到新建的文件目录[Blog]\themes\butterfly\layout\includes\page\flink_style
下。修改
[Blog]\themes\butterfly\layout\includes\page\flink.pug
,全部内容替换为:1
2
3
4
5
6
7case theme.flink_style
when 'volantis'
include ./flink_style/volantis.pug
when 'flexcard'
include ./flink_style/flexcard.pug
default
include ./flink_style/butterfly.pug新建
[Blog]\themes\butterfly\layout\includes\page\flink_style\butterfly.pug
:1
2
3
4
5
6
7
8
9
10
11
12
13
14
15
16
17
18
19
20
if top_img === false
h1.page-title= page.title
.flink
if site.data.link
each i in site.data.link
if i.class_name
h2!= i.class_name
if i.class_desc
.flink-desc!=i.class_desc
.flink-list
each item in i.link_list
.flink-list-item
a(href=url_for(item.link) title=item.name target="_blank")
.flink-item-icon
img.no-lightbox(src=url_for(item.avatar) onerror=`this.onerror=null;this.src='` + url_for(theme.error_img.flink) + `'` alt=item.name )
.flink-item-name= item.name
.flink-item-desc(title=item.descr)= item.descr
!= page.content新建
[Blog]\themes\butterfly\layout\includes\page\flink_style\volantis.pug
:1
2
3
4
5
6
7
8
9
10
11
12
13
14
15
16
17
18
19
20
21
22
if top_img === false
h1.page-title= page.title
.flink
if site.data.link
each i in site.data.link
if i.class_name
h2!= i.class_name
if i.class_desc
.flink-desc!=i.class_desc
.site-card-group
each item in i.link_list
a.site-card(target='_blank' rel='noopener' href=url_for(item.link))
.img
- var siteshot = item.siteshot ? url_for(item.siteshot) : 'https://image.thum.io/get/width/400/crop/800/allowJPG/wait/20/noanimate/' + item.link
img.no-lightbox(src=siteshot onerror=`this.onerror=null;this.src='` + url_for(theme.error_img.post_page) + `'` alt='' )
.info
img.no-lightbox(src=url_for(item.avatar) onerror=`this.onerror=null;this.src='` + url_for(theme.error_img.flink) + `'` alt='' )
span.title= item.name
span.desc(title=item.descr)= item.descr
!= page.content新建
[Blog]\themes\butterfly\layout\includes\page\flink_style\flexcard.pug
:1
2
3
4
5
6
7
8
9
10
11
12
13
14
15
16
17
18
19
20
if top_img === false
h1.page-title= page.title
.flink
if site.data.link
each i in site.data.link
if i.class_name
h2!= i.class_name
if i.class_desc
.flink-desc!=i.class_desc
.flink-list
each item in i.link_list
a.flink-list-card(href=url_for(item.link) target='_blank' data-title=item.descr)
.wrapper.cover
- var siteshot = item.siteshot ? url_for(item.siteshot) : 'https://image.thum.io/get/width/400/crop/800/allowJPG/wait/20/noanimate/' + item.link
img.no-lightbox.cover.fadeIn(src=siteshot onerror=`this.onerror=null;this.src='` + url_for(theme.error_img.post_page) + `'` alt='' )
.info
img.no-lightbox(src=url_for(item.avatar) onerror=`this.onerror=null;this.src='` + url_for(theme.error_img.flink) + `'` alt='' )
span.flink-sitename= item.name
!= page.content修改
[Blog]\themes\butterfly\source\css\_page\flink.styl
,同理,将样式文件也放到新建的[Blog]\themes\butterfly\source\css\_flink_style
目录下方便管理。
修改[Blog]\themes\butterfly\source\css\_page\flink.styl
:
1 | if hexo-config('flink_style') == 'butterfly' |
新建[Blog]\themes\butterfly\source\css\_flink_style\butterfly.styl
:
1 | .flink#article-container |
新建[Blog]\themes\butterfly\source\css\_flink_style\volantis.styl
:
1 | trans($time = 0.28s) |
新建[Blog]\themes\butterfly\source\css\_flink_style\flexcard.styl
:
1 | #article-container img |
因为
Volantis
的site-card
比Butterfly的flink-card
多出了一个站点缩略图,所以需要再额外添加一条配置项。修改[Blog]\source\_data\link.yml
,添加一条名为siteshot
的配置项。1
2
3
4
5
6
7
8
9- class_name: 糖果屋のVIP
class_desc: 售后服务享五折优惠2333
link_list:
- name: Akilar
link: https://akilar.top
avatar: /img/siteicon/favicon.png
descr: 欢迎光临糖果屋
siteshot: https://cdn.jsdelivr.net/gh/Akilarlxh/ScreenShot@gh-pages/akilar.top.jpg
# siteshot就是站点缩略图的链接。在
[Blog]\_config.butterfly.yml
中添加配置项:1
2# 友链样式,butterfly为默认样式,volantis为站点卡片样式.flexcard为弹性卡片样式
flink_style: volantis # butterfly | volantis | flexcard站点卡片添加了懒加载和图片失效替换。对应配置项为
[Blog]\_config.butterfly.yml
中的:1
2
3
4# Replace Broken Images (替換無法顯示的圖片)
error_img:
flink: # 头像失效替换图
post_page: # 站点缩略图
加载动画更换
参考了如下文章并尽量少改动下对butterfly4.5.0+进行了适配:
步骤:
创建动画结构模板文件:
新建[Blog]\themes\butterfly\layout\includes\loading\shine.pug
文件并添加如下代码:
1 | - loading_img = theme.preloader.avatar |
新建[Blog]\themes\butterfly\layout\includes\loading\gear.pug
文件并添加如下代码:
1 |
|
新建[Blog]\themes\butterfly\layout\includes\loading\ironheart.pug
文件并添加如下代码:
1 |
|
新建[Blog]\themes\butterfly\layout\includes\loading\wizard.pug
文件并添加如下代码:
1 |
|
新建[Blog]\themes\butterfly\layout\includes\loading\image.pug
文件并添加如下代码:
1 | - var loadimage = theme.preloader.load_image ? theme.preloader.load_image : theme.error_img.post_page |
修改index.pug
修改[Blog]\themes\butterfly\layout\includes\loading\index.pug
文件替换为如下代码:
1 | if theme.preloader.source === 1 |
修改loading.styl:
修改[Blog]\themes\butterfly\source\css\_layout\loading.styl
注释(或删除)掉其全部内容替换为如下:
1 | if hexo-config('preloader.enable') |
创建动画样式模板文件
新建动画样式模板存放的文件夹,所有动画样式均存放在[Blog]\themes\butterfly\source\css\_load_style\
目录下:
新建[Blog]\themes\butterfly\source\css\_load_style\default.styl
文件并添加如下代码:
(ps: 该代码其实为[Blog]\themes\butterfly\source\css\_layout\loading.styl
从第2行开始的原代码)
1 | .loading-bg |
新建[Blog]\themes\butterfly\source\css\_load_style\shine.styl
文件并添加如下代码:
1 | .loading-bg |
新建[Blog]\themes\butterfly\source\css\_load_style\gear.styl
文件并添加如下代码:
1 | #loading-box |
新建[Blog]\themes\butterfly\source\css\_load_style\ironheart.styl
文件并添加如下代码:
1 | .loading-bg |
新建[Blog]\themes\butterfly\source\css\_load_style\wizard.styl
文件并添加如下代码:
1 | .loading-bg |
新建[Blog]\themes\butterfly\source\css\_load_style\image.styl
文件并添加如下代码:
1 | .loading-bg |
加载动画背景色的自定义配置项:
修改[Blog]\themes\butterfly\source\css\var.styl
,大概第98行处:
1 | // preloader |
修改_config.butterfly.yml
修改[Blog]\_config.butterfly.yml
的 preloader 配置项如下:
1 | preloader: |
【配置项参数说明】:
- enable:控制加载动画的开关,取值有true和false,true开启,false关闭。
- load_color:该配置项为自定义加载动画背景颜色。默认值为#37474f,使用时注意用单引号’’包起来,不然会被识别成注释符。这个配置项最大的作用是配合load_image使用的图片的背景色,可以用取色器提取自定义图片的主要色调,以达到图片和背景融为一体的效果。
- source: 控制加载动画的样式:
default是主题原版的盒子加载动画:
pace是加载胶囊
Heo 同款 loading 动画
gear是旋转齿轮加载动画
ironheart是钢铁侠核心加载动画:
wizard是巫师施法加载动画:
image为自定义添加静态图片或gif作为加载动画。
- load_image:该配置项的生效前提是source:设置为6,内容填写图床链接或者本地相对地址。
gear加载动画魔改
- 这个动画跟本站主题色挺配的,但是中间有个洞美观性下降了点,于是打算用头像填充一下下,并改颜色为黑色半透明适配一下黑暗模式,不然晚上太晃眼了
修改gear.pug文件
修改[Blog]\themes\butterfly\layout\includes\loading\gear.pug
代码,添加.gear-loader_avater
1 |
|
修改gear.style
修改[Blog]\themes\butterfly\source\css\_load_style\gear.styl
添加如下注释处代码(渲染有报错就把注释去掉):
1 | #loading-box |
- 大功告成!
补充内容
添加了加载动画以后可能出现动画加载了半天,但是却进不了站,这点主要是因为加载动画的关闭与否是与网站加载状态的load的返回值决定的,而网站加载完成与否这个概念是很暧昧的,如果加装了pwa,清空缓存后再次加载的内容可能比想象的要多。
- 以下提供两种方案,一个超时自动结束,一个手动点击结束。两者兼容,你可以同时使用达到多重保险。
- 可以给加载动画设置一个settimeout()的函数来达到伪·加载完毕的效果,即超时了自动关闭加载动画,即使页面还在加载。
- 得益于加载动画使用的是原生js,所以可以给script添加async属性实现异步加载,以免阻塞后续HTML渲染。
- 仅仅需要给控制加载动画开关的loading-js.pug添加两行代码即可
- 例如使用的是
gear动画
,那么修改[Blog]\themes\butterfly\layout\includes\loading\gear.pug
文件删减添加-+处提示的代码即可:其中6000的单位是ms,代表你设置的最大容忍时间。可以自行修改。1
2
3
4
5
6
7
8
9
10
11
12
13
14
15- script.
+ script(async).
const preloader = {
endLoading: () => {
document.body.style.overflow = 'auto';
document.getElementById('loading-box').classList.add("loaded")
},
initLoading: () => {
document.body.style.overflow = '';
document.getElementById('loading-box').classList.remove("loaded")
}
}
window.addEventListener('load',()=> { preloader.endLoading() })
+ setTimeout(function(){preloader.endLoading();}, 6000)
这样一来,如果网站在六秒内加载完成,则优先执行window.addEventListener(‘load’,()=> {preloader.endLoading()}),如果超过6秒,则执行 setTimeout(function(){preloader.endLoading();}, 6000);,两者互不干扰。妙哉。
- 给整个loading-box添加一个点击动作,点击动画就能结束。
- 例如使用的是
gear动画
,那么同样修改[Blog]\themes\butterfly\layout\includes\loading\gear.pug
文件删减添加-+处提示的代码即可:1
2
3
4
5
6
7
8
9
10
11
12
13
14
15- script.
+ script(async).
var preloader = {
endLoading: () => {
document.body.style.overflow = 'auto';
document.getElementById('loading-box').classList.add("loaded")
},
initLoading: () => {
document.body.style.overflow = '';
document.getElementById('loading-box').classList.remove("loaded")
}
}
window.addEventListener('load',()=> {preloader.endLoading()})
+ document.getElementById('loading-box').addEventListener('click',()=> {preloader.endLoading()})
使用Gulp压缩静态资源
Gulp压缩静态资源减小网站文件大小以帮助加快网站访问速度。
参考文章:使用gulp压缩博客静态资源,本站采用压缩js、css、html的方法。
安装Gulp插件:
在博客根目录[Blog]打开终端,输入:
旧版本 HEXO 的安装:
1 | npm install --global gulp-cli #全局安装gulp指令集 |
新版本 HEXO(5.x) 安装:
1 | npm install gulp-cli -g |
安装下属插件
安装下属插件以实现对各类静态资源的压缩:
- 压缩HTML:
1
2
3npm install gulp-htmlclean --save-dev
npm install gulp-html-minifier-terser --save-dev
# 用gulp-html-minifier-terser可以压缩HTML中的ES6语法 - 压缩CSS:
1
npm install gulp-clean-css --save-dev
- 压缩js(该本版不对某些浏览器进行适配。ps: IE你走开!):
1
npm install gulp-terser --save-dev
为Gulp创建任务脚本。
在博客根目录[Blog]下新建gulpfile.js,打开[Blog]\gulpfile.js,输入以下内容:
1 | //用到的各个插件 |
使用命令
每次运行完hexo generate生成静态页面后,运行gulp进行压缩:
1 | hexo clean |
站长验证修复
站长验证标签通过原有的_config.butterfly.yml
进行添加可能不生效,接下来进行修复:
- 修改[blog]\themes\butterfly\layout\includes\head\site_verification.pug替换代码如下:
1
2
3if theme.site_verification.enable === true
each item in theme.site_verification.item
meta(name=item.name content=item.content) - 找到并修改
_config.butterfly.yml
中原来的站长验证项为如下:从各搜索引擎站长管理平台拿到的meta标签代码,添加相应的name值和content值到1
2
3
4
5
6
7
8
9
10
11# Verification (站长验证)
# --------------------------------------
site_verification:
enable: true
item:
- name: xxxx
content: xxxxxxxxxxxxxx
# - name: google-site-verification
# content: xxxxxx
# - name: baidu-site-verification
# content: xxxxxxx_config.butterfly.yml
即可
自定义字体样式
引入字体
ps:本站字体样式移植于yilia主题,可以直接照抄
下载字体文件放入新建的[blog]\themes\butterfly\source\fonts\
文件夹内:
本站所用字体打包:下载链接
在引入的自定义css文件(魔改配置章节)[blog]\themes\butterfly\source\css\custom.css
中添加如下代码:
1 | /*引入字体*/ |
设置字体
在引入的自定义css文件[blog]\themes\butterfly\source\css\custom.css
中继续添加如下代码:
1 | /*设置全局字体*/ |
butterfly代码框添加FiraCode字体
具体请查看:butterfly主题代码添加【Fira Code】字体效果
bannar波浪特效
Butterfly右下角悬浮菜单栏
添加直达底部按钮
修改[blog]\themes\butterfly\layout\includes\rightside.pug
添加如下代码即可:
1 | button |
添加阅读百分比
- 修改
[blog]\themes\butterfly\layout\includes\rightside.pug
添加如下代码:1
2
3
4
5
6
7
8
9
10
11button
span.scroll-percent //-如butterfly为4.9.0+,则注释掉这一行
i.fas.fa-arrow-up
//-添加如下两行
span
span %
//-
button
i.fas.fa-arrow-down - 添加js代码
在引入的自定义js文件中加入如下代码:1
2
3
4
5
6
7
8
9
10
11
12
13
14
15
16
17window.onscroll = percent;// 执行函数
// 页面百分比
function percent() {
let a = document.documentElement.scrollTop || window.pageYOffset, // 卷去高度
b = Math.max(document.body.scrollHeight, document.documentElement.scrollHeight, document.body.offsetHeight, document.documentElement.offsetHeight, document.body.clientHeight, document.documentElement.clientHeight) - document.documentElement.clientHeight, // 整个网页高度
result = Math.round(a / b * 100), // 计算百分比
up = document.querySelector("#go-up") // 获取按钮
if (result <= 95) {
up.childNodes[0].style.display = 'none'
up.childNodes[1].style.display = 'block'
up.childNodes[1].innerHTML = result;
} else {
up.childNodes[1].style.display = 'none'
up.childNodes[0].style.display = 'block'
}
} - 添加css代码
在引入的自定义css文件中添加如下代码(可以根据需求进行调整):1
2
3
4
5
6
7
8
9
10
11
12
13
14
15
16
17
18
19
20
21
22
23
24
25
26
27/* 返回顶部 */
button#go-up #percent {
display: none;
font-weight: bold;
font-size: 15px ;
}
button#go-up span {
font-size: 12px ;
margin-right: -1px;
}
/* 鼠标滑动到按钮上时显示返回顶部图标 */
button#go-up:hover i {
display: block ;
}
button#go-up:hover #percent {
display: none ;
}
#rightside>div>a,
#rightside>div>button {
display: flex;
align-items: center;
justify-content: center;
width: 38px;
height: 38px;
font-size: 18px;
}
标签添加文章数上标
参考:Butterfly 标签云增加文章数上下标 | Eurkon
- 修改
[blog]\themes\butterfly\scripts\helpers\page.js
如下(+-处)代码:1
2
3
4
5
6
7
8
9
10
11
12
13
14
15
16
17
18
19
20
21
22
23
24
25
26
27
28
29
30
31
32
33hexo.extend.helper.register('cloudTags', function (options = {}) {
const theme = hexo.theme.config
const env = this
let source = options.source
const minfontsize = options.minfontsize
const maxfontsize = options.maxfontsize
const limit = options.limit
const unit = options.unit || 'px'
let result = ''
if (limit > 0) {
source = source.limit(limit)
}
const sizes = []
source.sort('length').forEach(tag => {
const { length } = tag
if (sizes.includes(length)) return
sizes.push(length)
})
const length = sizes.length - 1
source.forEach(tag => {
const ratio = length ? sizes.indexOf(tag.length) / length : 0
const size = minfontsize + ((maxfontsize - minfontsize) * ratio)
let style = `font-size: ${parseFloat(size.toFixed(2))}${unit};`
const color = 'rgb(' + Math.floor(Math.random() * 201) + ', ' + Math.floor(Math.random() * 201) + ', ' + Math.floor(Math.random() * 201) + ')' // 0,0,0 -> 200,200,200
style += ` color: ${color}`
- result += `<a href="${env.url_for(tag.path)}" style="${style}">${tag.name}</a>`
+ result += `<a href="${env.url_for(tag.path)}" style="${style}">${tag.name}<sup>${tag.length}</sup></a>`
})
return result
})
首页分类磁贴
修改
[Blog]\themes\butterfly\layout\index.pug
如下:1
2
3
4
5
6
7
8
9
10extends includes/layout.pug
block content
include ./includes/mixins/post-ui.pug
+ if theme.categoryBar.enable === true
+ .recent-post-item(style='height:auto;width:100%;padding:0px;')
+
+postUI
include includes/pagination.pug新建
[Blog]\themes\butterfly\source\css\_layout\categoryBar.styl
:1
2
3
4
5
6
7
8
9
10
11
12
13
14
15
16
17
18
19
20
21
22
23
24
25
26
27
28
29
30
31
32
33
34
35
36
37
38
39
40
41
42
43
44
45
46
47
48
49
50
51
52
53
54
55
56
57
58
59
60
61
62
63
64
65
66
67
68
69
70
71
72
73
74
75
76
77
78
79
80
81
82
83
84
85
86
87
88
89
90
91
92
93
94
95
96
97
98
99
100if hexo-config('categoryBar.enable')
#categoryBar
width 100%!important
ul
&.categoryBar-list
margin 5px 5px 0 5px!important
padding 0!important
li
&.categoryBar-list-item
font-weight bold
display inline-block
height 180px!important
margin 5px .5% 0 .5%!important
background-image linear-gradient(rgba(0, 0, 0, 0.4) 25%, rgba(16, 16, 16, 0) 100%)
border-radius 10px
padding 25px 0 25px 25px!important
box-shadow rgba(50, 50, 50, 0.3) 50px 50px 50px 50px inset
overflow hidden
background-size 100%!important
background-position center!important
&:hover
background-size 110%!important
box-shadow inset 500px 50px 50px 50px rgba(50,50,50, 0.6)
span
&.categoryBar-list-count
&::after
transition all .5s
transform translate(-100%, 0)
a
&.categoryBar-list-link
color white!important
font-size 20px!important
&::before
content '|'!important
color white!important
font-size 20px!important
&:after
content ''
position relative
width 0
bottom 0
display block
height 3px
border-radius 3px
background-color white
&:hover
&:after
width 90%
left 1%
transition all 0.5s
span
&.categoryBar-list-count
display block!important
color white!important
font-size 20px!important
&::before
content '\f02d'!important
padding-right 15px!important
@extend .fontawesomeIcon
&::after
padding 5px
display block!important
color white!important
font-size 20px!important
position relative
right -100%
covers = hexo-config('categoryBar.cover')
for cover,i in covers
li.categoryBar-list-item:nth-child({i+1})
background unquote(cover)
descrs = hexo-config('categoryBar.descr')
for descr,i in descrs
li.categoryBar-list-item:nth-child({i+1})>span::after
content descr!important
if hexo-config('categoryBar.column') == 'odd'
li
&.categoryBar-list-item
width 32.3%!important
else if hexo-config('categoryBar.column') == 'even'
li
&.categoryBar-list-item
width 24%!important
@media screen and (max-width: 650px)
li
&.categoryBar-list-item
width 48%!important
height 150px!important
margin 5px 1% 0 1%!important
$caterow = hexo-config('categoryBar.row')?hexo-config('categoryBar.row'):2
.categoryBar-list
max-height 190px * $caterow
overflow auto
&::-webkit-scrollbar
width 0!important
@media screen and (max-width: 650px)
.categoryBar-list
max-height 160px * $caterow在
[Blog]\_config.butterfly.yml
添加配置项:1
2
3
4
5
6
7
8
9
10
11
12
13
14
15
16
17
18categoryBar:
enable: true
column: odd # 显示列数,odd:3列 | even:4列
row: 2 #显示行数,默认两行,超过行数切换为滚动显示
descr:
- 博客搭建
- butterfly魔改
- 医学科普
- 医学笔记
- 数码
- 软件
cover:
- url(/img/custom/cover/cha06.webp) #url('https://assets.akilar.top/image/cover1.webp')
- url(/img/custom/cover/cha08.webp) #'#abcdef' # HEX格式色值需要用''包裹,不然会被识别成注释
- url(/img/custom/cover/cha03.webp) #rgba(45,67,89,0.7)
- url(/img/custom/cover/cha04.webp) #linear-gradient(rgba(0, 0, 0, 0.4) 25%, rgba(200,16 , 16, 0) 100%)
- url(/img/custom/cover/cha01.webp)
- url(/img/custom/cover/cha02.webp)
Butterfly主题添加特殊日子全局黑白模式
Butterfly添加顶部加载进度条
- PS: 为你的Butterfly添加顶部加载进度条
- 引入 css:
1
2
3
4
5
6
7
8
9
10
11
12
13
14
15
16
17
18
19
20
21
22
23
24
25
26
27
28
29
30
31
32
33
34
35
36
37
38
39
40
41
42
43
44
45
46
47
48.pace {
pointer-events: none;
user-select: none;
z-index: 2;
position: fixed;
margin: auto;
top: 4px;
left: 0;
right: 0;
height: 8px;
border-radius: 8px;
width: 6rem;
background:
overflow: hidden;
}
.pace-inactive .pace-progress {
opacity: 0;
transition: 0.3s ease-in;
}
.pace.pace-inactive {
opacity: 0;
transition: 0.3s;
top: -8px;
}
.pace .pace-progress {
box-sizing: border-box;
transform: translate3d(0, 0, 0);
position: fixed;
z-index: 2;
display: block;
position: absolute;
top: 0;
right: 100%;
height: 100%;
width: 100%;
background:
background: linear-gradient(
to right,
rgb(18, 194, 233),
rgb(196, 113, 237),
rgb(246, 79, 89)
);
animation: gradient 2s ease infinite;
background-size: 200%;
} - 引入js:
1
<script src="//cdn.bootcss.com/pace/1.0.2/pace.min.js"></script>
banIE
Fork: Ariasaka | 博客魔改日记(2)
新建
[blogRoot]/source/noIE.html
1
2
3
4
5
6
7
8
9
10
11
12
13
14
15
16
17
18
19
20
21
22
23
24
25
26
27
28
29
30
31
32
33
34
35
36
37
38
39
40
41
42
43
44
45
46
47
48
49
50
51
52
53
54
55
56
57
58
59
60
61
62
63
64
65
66
67
68
69
70<!-- 叔叔老家那里扒的qwq -->
<meta charset="utf-8">
<center style="padding-top:20px">很抱歉IE已经停止支持,因此本博客不再支持IE浏览器,如果想要正常浏览,请换用新版Edge或Chrome、Firefox、Opera等现代浏览器</center>
<html lang="en"><head>
<meta charset="UTF-8">
<meta name="viewport" content="width=device-width, initial-scale=1.0">
<meta http-equiv="X-UA-Compatible" content="ie=edge"><meta name="spm_prefix" content="888.7521">
<title>浏览器升级提示 | Ariasakaの小窝</title>
<link href="https://at.alicdn.com/t/font_1454899_pqhvobved2o.css" rel="stylesheet" type="text/css">
<style>
* { padding: 0; margin: 0; box-sizing: border-box;}
ul, li { list-style: none; }
a:hover {text-decoration:none;}
ins,a {text-decoration:none;}
a:focus,*:focus {outline:none;}
.b-content { width: 400px; margin: 60px auto; font-size: 14px; color: #999; }
.pic-box { padding-bottom: 20px; border-bottom: 1px solid #eee; }
.pic-box img { max-width: 100%; margin-bottom: 10px; }
.pic-box p { line-height: 20px; font-size: 12px;}
.text-box .title {text-align: center; margin: 30px 0;}
.text-box .list {height: 90px;}
.text-box .list li a { float: left; width: 100px; text-align: center; line-height: 24px; color: #666;}
.text-box .list li .iconfont{ font-size: 30px; }
.text-box .list li a span{ font-size: 12px; color: #999; }
.copyright {margin-top: 20px; text-align: center;}
</style>
</head>
<body>
<div class="b-content">
<div class="text-box">
<div class="title">以下四款官方正版浏览器任君挑选</div>
<div class="list">
<ul>
<li>
<a href="https://www.google.cn/intl/zh-CN/chrome" target="_blank">
<i class="iconfont icon-chrome"></i><br>
Chrome<br>
<span>谷歌</span>
</a>
</li>
<li>
<a href="https://www.mozilla.org/zh-CN/firefox/new" target="_blank">
<i class="iconfont icon-firefox"></i><br>
Firefox<br>
<span>火狐</span>
</a>
</li>
<li>
<a href="https://www.microsoft.com/edge" target="_blank">
<i class="iconfont icon-edge"></i><br>
Edge(新版)<br>
<span>微软</span>
</a>
</li>
<li>
<a href="https://www.opera.com/zh-cn" target="_blank">
<i class="iconfont icon-opera"></i><br>
Opera<br>
<span>欧朋</span>
</a>
</li>
</ul>
</div>
</div>
</div>
</body></html>跳过渲染,修改
[blogRoot]/source/noIE.html
在其开头添加:1
2
3---
layout: false
---新建noie_banIE.js并引用:
1
2
3if(!!window.ActiveXObject || "ActiveXObject" in window){
window.location.href="./noIE.html";
}
页脚添加GitHub样式徽标
更多细节See: Akilar | Add Github Badge
- 修改[Blogroot]\themes\butterfly\layout\includes\footer.pug,添加页脚标签循环节:
注意对齐1
2
3
4
5
6
7
8if theme.footer.custom_text
.footer_custom_text!=`${theme.footer.custom_text}`
//v3.4.0以下版本可能还有ICP的配置项。此处只要保证p和上方的if缩进平级就好。
+ p
+ if theme.ghbdage.enable
+ each item in theme.ghbdage.bdageitem
+ a.github-badge(target='_blank' href=url_for(item.link) style='margin-inline:5px')
+ img(src=url_for(item.shields) title=item.message) - 在[Blogroot]_config.butterfly.yml中添加相关配置项:
1
2
3
4
5
6
7
8
9
10
11
12
13
14
15
16
17
18
19
20
21
22
23
24ghbdage:
enable: true
bdageitem:
- link: https://hexo.io/ # 标签跳转链接
shields: https://img.shields.io/badge/Frame-Hexo-blue?style=flat&logo=hexo #shields的API链接,填法参考本篇教程
message: 博客框架为Hexo_v5.3.0 #鼠标悬停时显示的信息
- link: https://butterfly.js.org/
shields: https://img.shields.io/badge/Theme-Butterfly-6513df?style=flat&logo=bitdefender
message: 主题版本Butterfly_v3.4.2
- link: https://www.jsdelivr.com/
shields: https://img.shields.io/badge/CDN-jsDelivr-orange?style=flat&logo=jsDelivr
message: 本站使用JsDelivr为静态资源提供CDN加速
- link: https://vercel.com/
shields: https://img.shields.io/badge/Hosted-Vercel-brightgreen?style=flat&logo=Vercel
message: 本站采用双线部署,默认线路托管于Vercel
- link: https://vercel.com/
shields: https://img.shields.io/badge/Hosted-Coding-0cedbe?style=flat&logo=Codio
message: 本站采用双线部署,联通线路托管于Coding
- link: https://github.com/
shields: https://img.shields.io/badge/Source-Github-d021d6?style=flat&logo=GitHub
message: 本站项目由Github托管
- link: http://creativecommons.org/licenses/by-nc-sa/4.0/
shields: https://img.shields.io/badge/Copyright-BY--NC--SA%204.0-d42328?style=flat&logo=Claris
message: 本站采用知识共享署名-非商业性使用-相同方式共享4.0国际许可协议进行许可
添加RSS订阅
更多详情看项目主页:hexo-generator-feed
安装feed模块:
1 | npm install hexo-generator-feed --save |
配置文件[blog]\_config.yml
添加配置(按需修改):
1 | feed: |
配置文件[blog]\_config.butterfly.yml
添加menu
项配置:
1 | menu: |
待续